
Homeowners: Fix Float Switch Failure in Five Minutes, Know the Safety Steps
Homeowner troubleshooting for float switch failure: safety‑first checks, exact multimeter results (near 0 ohms or OL), quick five‑minute cleaning fixes,...

A failed float switch stops your pump from turning on or off the way it should, which sets up overflow, dry-running, or a silent alarm at the worst possible moment. The first move is always the same: cut power at the breaker or unplug the unit before touching anything wet or opening the panel. Once the system is de-energized, you can inspect, test, and decide whether the fix is a five-minute cleaning or a full replacement, both covered below.
TL;DR:
- Float switches in septic and sump systems are often jammed by debris, grease, or biofilm, causing pumps to run nonstop or not activate at all.
- Safety procedures demand full power cutoff before inspection, and visual checks along with manual testing help identify mechanical or electrical failures.
- Continuity testing with a multimeter should show near zero ohms when closed and infinite when open; mixed readings indicate a switch problem.
- Replace the switch if it shows water damage, cracked housing, or inconsistent readings, especially after repeated failures; maintenance includes quarterly visual checks.
- Professional inspection and repairs are advised for confined-access systems or persistent issues, with upgrades to sealed or corrosion-resistant parts offering longer-term reliability.
Table of Contents
- Signs of Float Switch Failure and How Urgent They Are
- What Causes a Float Switch to Malfunction?
- How Do You Troubleshoot a Float Switch Safely?
- How Do You Test a Float Switch With a Multimeter?
- Repair or Replace: What’s the Right Call?
- How Often Should You Inspect and Maintain a Float Switch?
- Field Notes From Jason at J&M Septic
- What This Guide Gets Right That Most Advice Skips
- Get a Professional Float Switch and Septic Diagnosis
- Where to Verify These Testing and Safety Standards
- Sources
- FAQ
Signs of Float Switch Failure and How Urgent They Are
A pump that runs nonstop, one that never kicks on at all, or an alarm that stays quiet during a rising water level are the three clearest warning signs of float switch malfunction. Add gurgling drains, water pooling where it shouldn’t, or a pump cycling erratically, and you’ve got a pattern worth acting on immediately.
- Pump runs constantly: often a float stuck in the “on” position from debris or a jammed guide rail.
- Pump never starts: the switch may be waterlogged, disconnected, or electrically dead.
- Alarm stays silent during high water: a serious risk since it’s your last line of defense against overflow.
- Gurgling pipes or slow drains: early indicators the system is backing up.
Ignoring these common septic system problems risks basement flooding, pump burnout from dry-running, or a septic overflow that creates a genuine health hazard. If you see standing water or sewage backing up right now, treat it as an emergency and call for service. If the alarm is silent but nothing has overflowed yet, you have time to run through the troubleshooting steps below before deciding.
What Causes a Float Switch to Malfunction?
Most float switch problems trace back to one of five root causes, and knowing which one you’re dealing with saves a lot of guesswork.
- Debris and biofilm: grease, hair, wipes, and sludge jam the float or its guide rail, especially in septic and sump pits where solids accumulate over months.
- Waterlogged or cracked float: once water gets inside the float body, it loses buoyancy and stops rising the way it’s supposed to.
- Contact or reed switch failure: corrosion, moisture ingress, or contacts welded shut from an overloaded circuit all mimic a “stuck” switch.
- Wrong switch type or rating: using a float rated for a lighter load than your pump draws is a frequent, avoidable cause of electrical contact failure.
- Poor mounting or wear: a float installed at the wrong angle, or one that’s simply aged past its service life, will trip early, late, or not at all.
In septic tanks specifically, grease and sanitary wipes cause a disproportionate share of mechanical jamming, which is one reason effluent-filter maintenance matters as much as the float itself.
How Do You Troubleshoot a Float Switch Safely?
Work through these steps in order. Skipping the first one is how people get hurt around wet electrical equipment.
- Cut the power. Unplug the pump or switch off the breaker before touching anything. This is the single most important step in any float switch troubleshooting process, since you’re working near water and live wiring at the same time.
- Inspect visually. Pull the pump if you can access it, and check the float for tangled cords, sludge buildup, or physical cracks. Clean the float path with a soft brush. Avoid harsh solvents unless you know they’re compatible with the float’s plastic housing.
- Actuate it by hand. With power still off, raise and lower the float manually and listen or watch for a response once power is restored briefly for the test. If the pump or alarm reacts correctly to manual movement, your fault is likely mechanical debris or a wiring issue at the controller, not the switch itself.
- Check the wiring and terminals. Loose connections and corroded terminals are common and often fixable by cleaning contacts or re-tightening. Heavily corroded wire should be cut back and re-terminated rather than patched.
- Re-test the whole system. Fill the pit gradually with water if you can, and confirm the pump activates and deactivates at the correct levels before calling the job done.
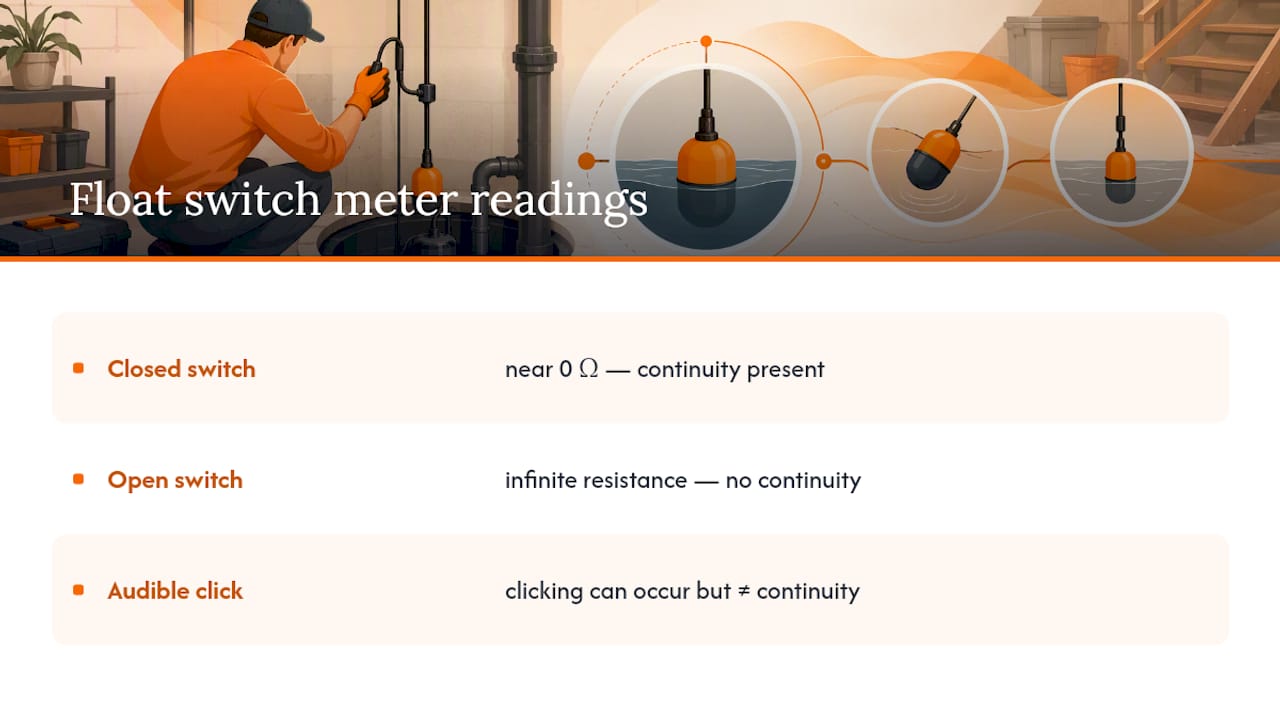
Pro Tip: A float that clicks audibly when you tap it can still be electrically dead inside. A welded or corroded reed switch sometimes produces a mechanical click with zero continuity, which fools a lot of people into thinking the switch is fine.
How Do You Test a Float Switch With a Multimeter?
Set your multimeter to continuity mode or the lowest ohms setting, and confirm power is fully disconnected before you touch any leads. Test at the switch leads first, then again at the controller end, since a cable fault between the two points can hide a perfectly good switch behind bad wiring. Label each wire before you disconnect anything.
| Switch position | Expected reading | What it means |
|---|---|---|
| Closed (float up, contact made) | Near 0 to 1 ohm | Switch is functioning normally |
| Open (float down, contact released) | Infinite / OL | Normal open state |
| Intermittent or fluctuating | Varies erratically | Corroded or failing contact |
| High resistance in closed position | Above a few ohms | Partial contact failure, likely corrosion |
A correctly functioning switch reads near 0 ohms when closed and infinite when open; anything in between points to a problem. Watch for moisture that’s wicked into the cable and shows a false closed reading at the controller even though the switch itself tests open, and always verify readings at both ends before condemning the part.
Repair or Replace: What’s the Right Call?
Replace the float switch outright if it fails continuity testing, shows a cracked or waterlogged housing, or has damaged wiring you can’t cleanly repair. Repeat failures on the same unit are also a sign it’s time to swap it rather than keep patching it.
- Parts-only cost for a basic residential float switch varies by cable length and type, generally costing tens of dollars or more.
- Sealed cable floats generally cost more than simple mechanical tilt switches but resist water ingress better.
- Material matters: 316 stainless steel housings hold up longer in corrosive septic or sump environments than plastic.
- Labor and access difficulty, especially in a septic tank or a deep sump pit, often add more to the total bill than the part itself.
Call a professional when access is confined, when you’re not confident around the electrical panel, or when the float is inside a septic system rather than a simple sump pit. A professional septic service can provide an exact estimate once a technician sees the setup.
How Often Should You Inspect and Maintain a Float Switch?
A quick visual check every quarter catches tangled cords and early debris buildup before they become a full failure. A more thorough annual test, ideally before your area’s wet season, should include manual actuation, a basic continuity check, and confirmation that alarm trip points still match your system’s design.
- Wipe down the float housing gently; skip harsh solvents unless the manufacturer confirms compatibility with the plastic or rubber components.
- Consider upgrading to sealed, corrosion-resistant floats (stainless steel or PTFE-coated) in septic or high-moisture environments.
- Use a relay or contactor so the float switch controls a low-current signal instead of switching the full pump load directly, which is one of the most reliable ways to prevent welded contacts.
- Confirm the switch’s electrical rating matches or exceeds your pump’s draw before installation, not after a failure.
Pro Tip: Scheduling cleaning and testing before wet-season months, rather than after the first flood scare, is the cheapest insurance you’ll ever buy for a pump system. Homeowners who stay ahead of debris buildup and get septic failure prevention on a routine call far fewer emergency service calls than those who wait for symptoms.
Field Notes From Jason at J&M Septic
Most float switch calls we get in Alamance County trace back to the same two things: grease and wipes fouling the float in a septic tank, or a homeowner who swapped in a switch that wasn’t rated for their pump’s amperage. The first is a cleaning job. The second usually means a replacement plus a relay to protect the new part.
Jobs that need excavation, tank access, or hydro-jetting to clear a blocked line aren’t DIY territory, and pretending otherwise usually turns a $150 fix into a much bigger one. If your float sits inside a septic tank rather than an open sump pit, get a professional set of eyes on it before you start pulling covers.
What This Guide Gets Right That Most Advice Skips
Most troubleshooting guides tell you to “check the float switch” without explaining what a passing test actually looks like on a meter, and that gap is where homeowners get stuck or make bad calls. The real value here is specific: near 0 ohms closed, infinite open, and a clear warning that a click doesn’t mean continuity.
The conventional wisdom oversells DIY replacement as always the cheaper option. It’s cheaper when the float sits in an open sump basin you can reach with your hands. It’s a false economy when the float lives inside a septic tank, because the risk isn’t just a wasted part, it’s cracking a seal or disturbing a baffle you can’t see.
Prioritize safety first, testing second, and replacement decisions last. A five-minute cleaning solves more float switch failures than people expect, but only after you’ve confirmed power is off and you know what a bad reading actually looks like. Skipping straight to a new part without testing wastes money about as often as ignoring a real failure wastes time.
— Jason
Get a Professional Float Switch and Septic Diagnosis
If you’ve run through the checks above and the float still won’t test clean, or the switch lives inside a septic tank instead of an open sump pit, that’s the point to bring in a professional rather than keep guessing. Professional septic services handle the diagnostics, float and pump replacement, and hydro-jetting that DIY troubleshooting can’t safely reach, often with local expertise in soils and septic setups.

A typical service visit starts with a full system check: power isolation, visual inspection, and multimeter testing at the switch and controller, the same sequence outlined above but with the tools and access to confirm a diagnosis on the spot. If the float tests fine and the issue is a clogged line or fouled effluent filter, hydro-jetting clears it without excavation. If the switch has failed electrically or the float housing is compromised, replacement happens the same visit in most cases.
Standing water, a septic alarm that won’t stop, or a system that’s backed up already needs faster action than a scheduled appointment allows. Jmseptic’s emergency septic repair service covers exactly that scenario for homes across Burlington, Mebane, Elon, Graham, Whitsett, and McLeansville. For anything short of an active emergency, a certified septic inspection will confirm whether you’re looking at a simple float replacement or something bigger. Reach out through Jmseptic to get a technician scheduled.

Where to Verify These Testing and Safety Standards
The multimeter readings, safety sequencing, and failure patterns in this guide come from manufacturer troubleshooting documentation and field-tested electrical practices, not guesswork.
- ACTSENSORS’ failure symptom guide covers what happens system-wide when a float switch stops responding correctly.
- ELECALL’s troubleshooting guide details electrical overload as a root cause of welded or burned contacts.
- Rochester Sensors’ troubleshooting documentation sets the expected resistance readings for pass/fail testing.
- Soaring Instrument’s troubleshooting breakdown explains testing at both the switch and controller to isolate cable faults.
- For sump-specific upkeep, this maintenance schedule lays out a practical inspection calendar homeowners can follow year-round.
Sources
- What happens if a float switch is not working? — ACTSENSORS
- Why Float Switch Not Working: Common Causes, Troubleshooting & Solutions (2026 Guide) | ELECALL
- Trouble Shooting Float Level Sensor – Rochester Sensors
- How do you effectively troubleshoot float switch problems? — Soaring Instrument
FAQ
What Happens if a Float Switch Fails?
The pump can fail to start or stop correctly, which leads to overflow, dry-running, or a silent alarm that leaves you unaware of a rising water level until damage is already done.
How Much Does It Cost to Replace a Float Switch?
Parts-only cost for a basic residential float switch varies by cable length and type, generally costing tens of dollars or more, with labor adding more if access is difficult; Jmseptic provides exact estimates after an on-site look.
How Can I Fix a Faulty Float Switch?
Cut power first, clean debris from the float path, manually actuate it to check response, then test continuity with a multimeter at both the switch and controller before deciding between a cleaning fix and a full replacement.
What Is the Typical Lifespan of a Float Switch?
Float switches are generally treated as a consumable part with a limited service life, and regular inspection plus correct electrical rating extends that life, though replacement remains a normal part of long-term maintenance.